
Introduction
When you’re learning OT security and want a hands-on lab experience, LabShock is an excellent open-source resource created by Zakhar. It offers pre-built containers simulating PLCs, SCADA systems, and a pentesting terminal — making it a great starting point for aspiring OT security professionals.
However, while using the Pentest Fury module of LabShock, you may run into a license validation restriction applied by the creators. This is a genuine restriction, designed to limit usage of the lab for a short initialization period. The message typically says:
“License validation failed – please wait 5 minutes to initialize.”
Unfortunately, in some cases — including mine — even after waiting for more than an hour, the pentest box never became accessible via the web interface. This left me unable to perform the intended exercises using the browser-based terminal.
Rather than give up, I discovered a clean workaround: by directly accessing the Docker container shell for the labshock-pentest box, I was able to copy necessary tools, run Modbus queries, and execute a scripted pump shutdown attack — all while still working within the intended lab boundaries.
In this post, You’ll learn how to:
- Set up the lab using official LabShock instructions
- Bypass the stuck licensing error by accessing the pentest container directly
- Install and run
mbtget, a Modbus testing tool - Upload and execute the “Hack the Pumps” Python script from NVISO
- Simulate a real-world OT attack by switching off pumps in the SCADA system
Let’s get started.
Lab Setup – Official Instructions First
Lab Setup Overview
Prerequisites
- Ubuntu machine or VM with sudo/root access
- Docker Engine installed on Ubuntu
- Git tool on your Ubuntu to clone the LabShock repository
- Minimum System Requirements:
- RAM: 4 GB
- HDD: 10 GB free space
- Stable internet connection
- LabShock Containers from official GitHub repo: https://github.com/zakharb/labshock
- Python attack script inspired by NVISO’s “Refinery Raid” blog NVISO and
- “mbtget” tool (for Modbus interactions)

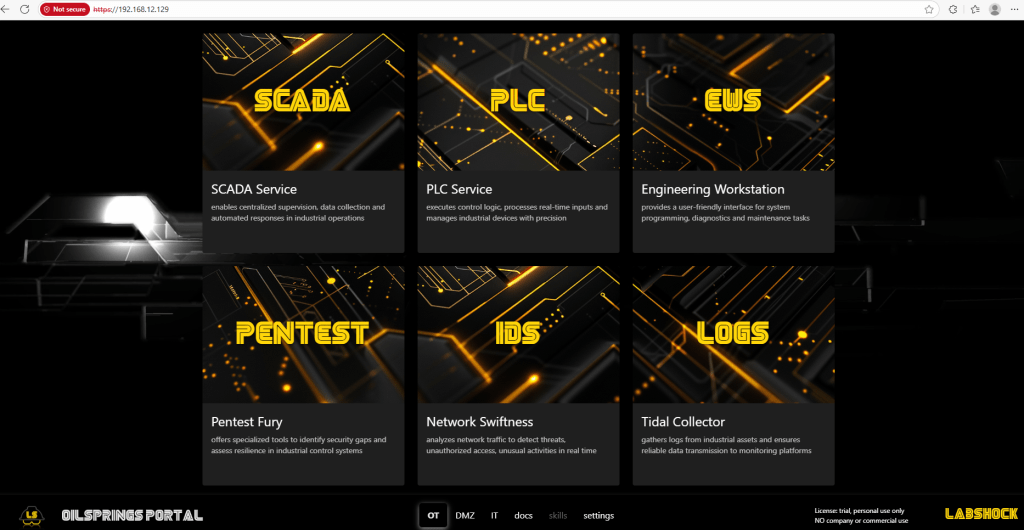
After successful setup, you should be able to access:
Once you’ve:
- Installed Docker successfully
- Pulled and built the LabShock containers
- Verified that the LabShock portal, SCADA dashboard, and PLC interface are all up and running
Backup, Backup, Backup! (Snapshot Advice)
Create a snapshot or VM backup right at this point.
Why? Because things can break. Containers might fail to restart, licensing issues may persist, or accidental changes can corrupt the environment. And rebuilding the entire LabShock stack — which involves downloading 3–4 GB of container images — is not something you want to repeat just because of a minor hiccup.
Snapshot once, save hours later.
Problem Statement: The Pentest Portal That Won’t Start
After 5 minutes of initialization, the pentest portal should unlock, giving you access to a Kali-style terminal.
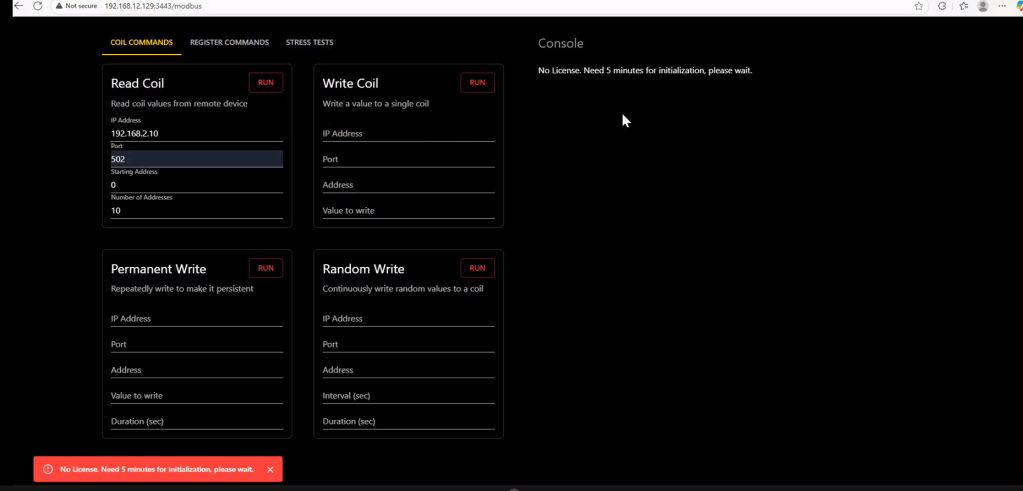
But here’s what actually happens:
- You click on the Pentest Box terminal
- It shows:
License expired. Wait 5 minutes for re-initialization - Even after waiting, it stays locked indefinitely

That’s a problem because you can’t do anything without that terminal. This is where the container shell workaround comes in.
Workaround: Use Container Shell Instead
We’ll bypass the non-functional terminal by jumping straight into the container’s shell.
Prepare Tools Before Entering the Container
Before jumping into the pentest container shell, it’s best to download all the necessary tools ahead of time and transfer them into the container.
Since the LabShock containers have no internet access, you’ll need to do this from your Ubuntu base machine (the host) and push files into the container manually.
Step 1: Download the Tools on Host (Ubuntu Machine)
1.1 Download “mbtget”

This will create a directory named mbtget in your current location.
Step 2: Create the Python Attack Script

- Go to the NVISO Labs and copy the full Python script from the Hack the Pump section.
- On your Ubuntu machine, create a new file:

name the file as “IlikeTOPUMP.py” or any name of your choice
- Paste the script into this file.
- Save and exit (Ctrl + O, then Ctrl + X).
Step 3: Transfer Tools to LabShock Pentest Container
Once you’ve downloaded the tools to your Ubuntu base machine, use the following commands to transfer them into the LabShock pentest container:
First, identify the container name:

Look for a container with a name like labshock-pentest-1.
Then run these commands:

These commands will copy both tools into the /home/pentest/ directory inside the container named labshock-pentest-1.
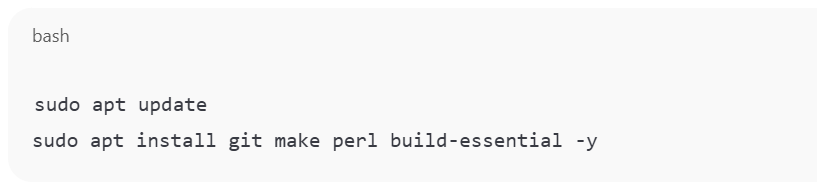
Step 4: Build the mbtget Tool Inside the Container
Once the tools are copied into the container, follow these steps to compile the mbtget tool:
- Access the container shell:

You’ll be dropped into the default directory, likely /app.
2. Navigate to the mbtget directory:

3. Install the tool using the provided Makefile:

4. Run mbtget to test if it works:

This compiles the tool and creates the mbtget binary.
Now test if the tool is working:

You should get valid Modbus values from the PLC!
Launch the OT Attack Simulation
After verifying that mbtget works, it’s time to launch the Python script that interacts with the PLC and simulates a real-world attack by controlling the pumps.
Now you’re ready to simulate the attack:
Use the following command inside the container:

You’ll see a prompt like:

Choose 2 to turn off the pumps.
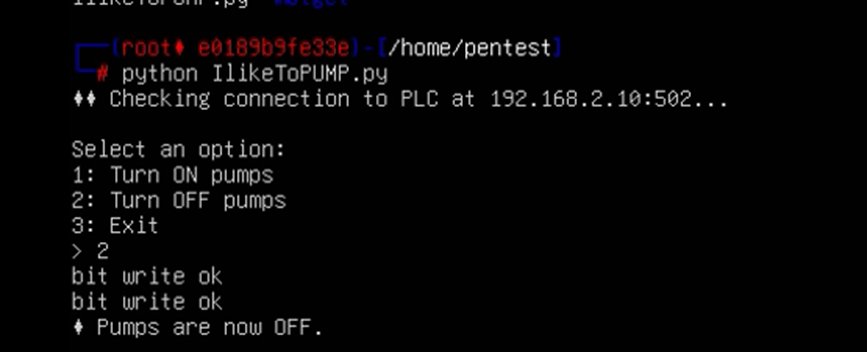
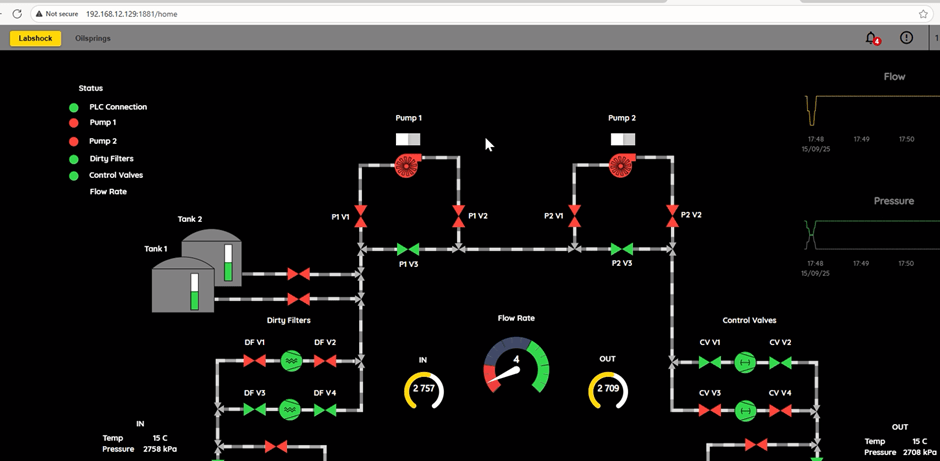
Then go to your SCADA dashboard (localhost:8080) and visually confirm that the pumps are OFF.
🎉 Congratulations! You’ve executed a full end-to-end OT attack simulation using real protocols and tooling.
Acknowledgements
This lab walkthrough and OT pentesting exercise wouldn’t have been possible without the work of others in the community.
- Zakhar – the creator of LabShock, for building and sharing this excellent open-source OT lab simulation platform.
- The team at NVISO – for their insightful blog post titled “Refinery raid”, which provided the Python attack script and a practical overview of exploiting insecure industrial setups. Their work made it easier to craft a meaningful attack demo for educational purposes.
Before diving deep into attacks or installing tools inside the LabShock containers, take a moment to create a snapshot of your setup. Trust me, it’ll save you hours of frustration later.
Closing Thoughts
This workaround respects the original lab’s design and doesn’t modify any container or licensing mechanism. It’s a simple alternative to ensure your learning doesn’t stop due to persistent initialization bugs.
Feel free to cite this method in your own training programs, and if you’re building an OT pentest course or workshop, this lab (with the workaround) is a great real-world training resource.
For any questions or walkthrough requests, reach out via the comments or connect through Simone’s Cybersecurity website.
Happy Pentesting!

Leave a comment